
7 Tips to create an Aphex Twin track with Drumazon2 Lush2 and Repeater
Welcome to another Synth Icons episode 😊.
This one is about creating those glitchy Aphex Twin drum sounds and patterns and turn them into a track. Here are 7 tips to do just that.
I also made a video on this to make sure you can hear what I’m doing. Check it out on the Synth Icons Youtube channel (don’t forget to subscribe!).
The video version of this blog is somewhat more condensed:
00:00 the project setup
00:25 the ideal ambient synth: lush 2
01:15 dub effects
01:32 break away from boring 4 on the floor patterns: use Drumazon's built-in powerful sequencer
02:00 how to make those metallic ruffles
02:25 record send effects and cut and paste hem later on
03:22 don't draw your automation. Instead: record your performance
05:02 mind your audio bandwidth
PICKING THE RIGHT TOOLS
First, let’s pick the right instruments and tools to get those perfect Aphex Twin drums.
We need drum sounds that cut through anything. We’re looking for a massive TR909 kick, which is better suited than the boomier 808 series, and brings a lot more bite and punch to the table. The 909 also has hihats that are very present and full (in contrast to the sometimes chimey and light ones from the 808).
I don’t want this post to become a commercial review article, but the best TR909 emulation we know is Drumazon by D16 Group, which at the time of writing has been upgraded to version 2.
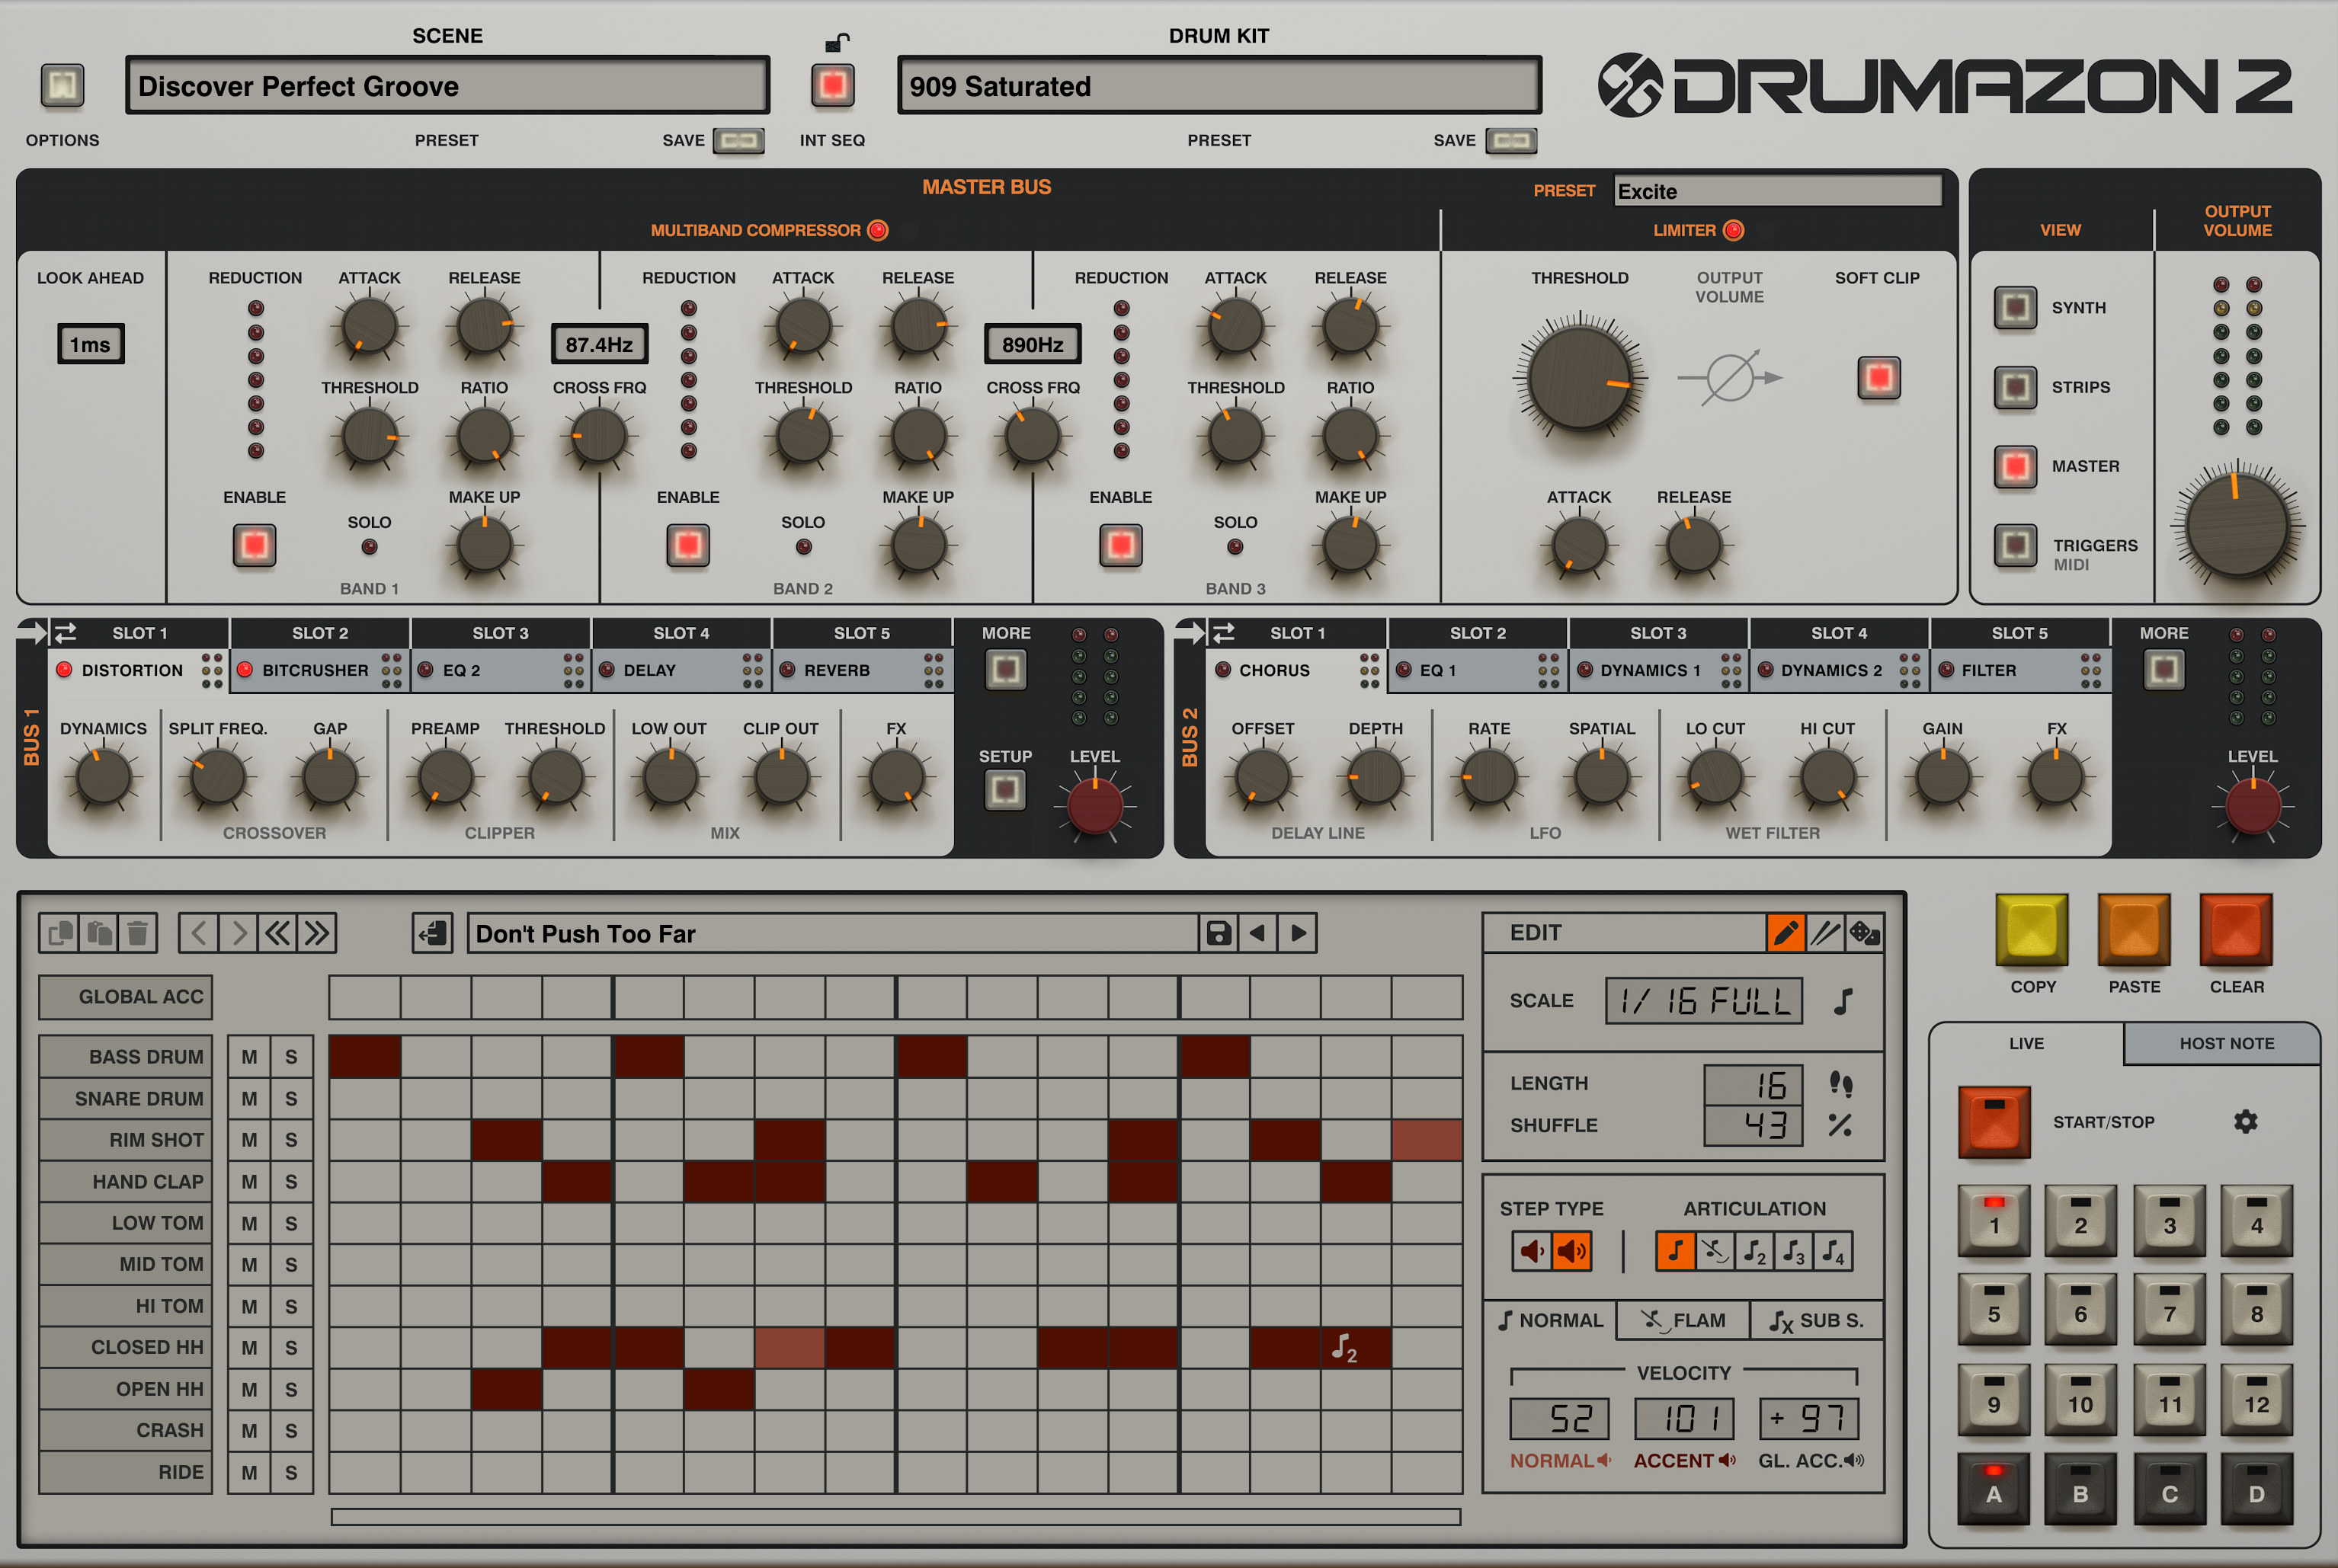
A full walkthrough of this drum machine would need a few articles in itself. For the scope of this post it suffices to say that with Drumazon 2 you can pick any of the readily available sounds from the preset banks that come with the plugin, and you’ll be more than just fine already 😊.
I find Drumazon 2 and the vast sound library it comes with to be a dream if you are looking for clearly defined sounds. Each drum sound in that plugin takes the space it’s made for convincingly. For instance, your heavy and hard 909 kick punch will sit right where you’d expect it: at 50hz, and the snare will be at the expected 1kHz. Just to say that Drumazon comes with very clean sounds, ideal for modern music production and very easy to work with.
Of course, we will be tweaking those presets in function to our needs, and again, with Drumazon you get full control over the envelopes of the sounds, including flexible effects routing for a multi-slots chain of the obligatory bit crushers, distortions, very nasty 24db filters, chorus/flanger and reverbs to make exactly that sound you are after.
I truly haven’t seen this level of versatility and control in any other TR909 plugin (and I have scrutinized quite a few already 😉).
Tip 1 – Wide ambient low end with Lush 2
The company that made the Drumazon 2 VST emulation, D16 Group, also made the synth that Aphex Twin is known to use in his ambient tracks: Lush 2.
We’ll be using the same synth to start with an airy and dark harmonic progression.
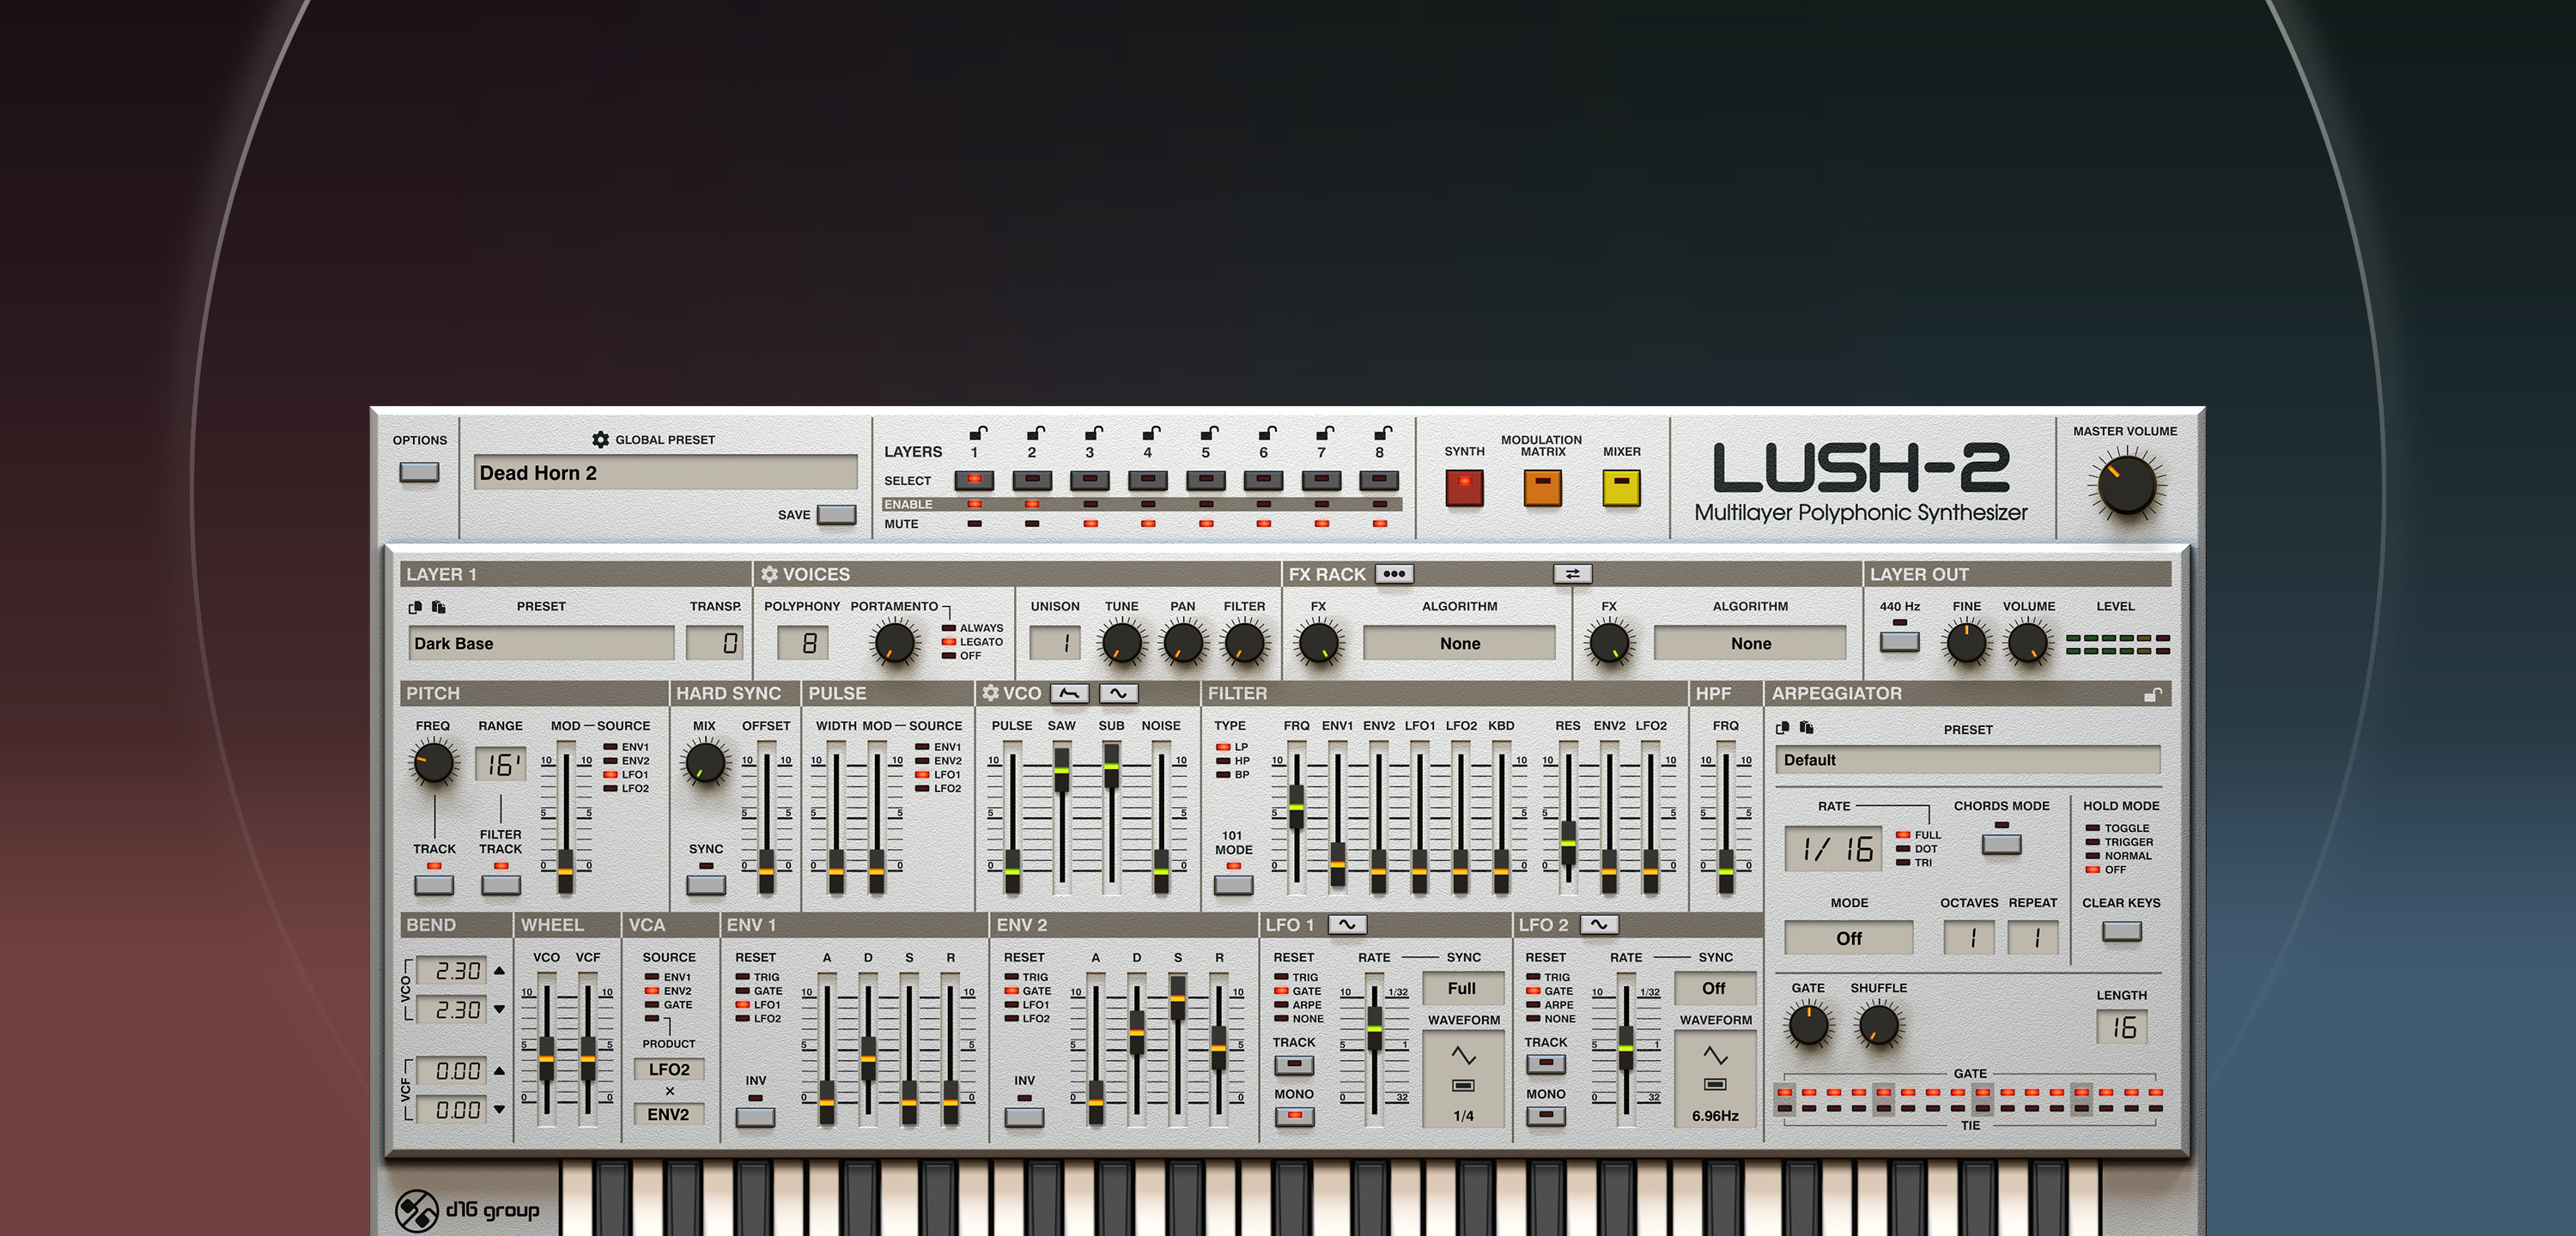
In the Youtube video, you’ll notice that we simply picked a Lush preset that has a very wide low end. This is great since it makes it easer for our kick drum to cut through that. We already have a kick sound in mind which will be sitting around 50Hz, so we’re making sure that our chords don’t go any lower than 60Hz-ish. Again, with Lush this is dead easy. You’ll see that I’m not even using any EQ to cut the low end. I do apply some of that excellent dynamic EQ from Tokyo Dawn Labs, the TDR Nova, to tame the wild and living Lush low end.
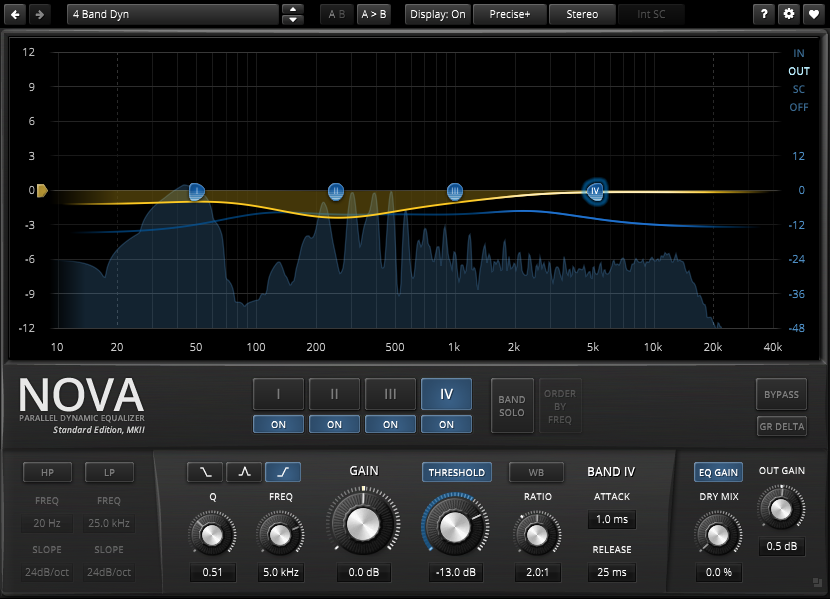
You need to lay your hands on that plugin if you haven’t already. It’s excellent, and totally free, too!
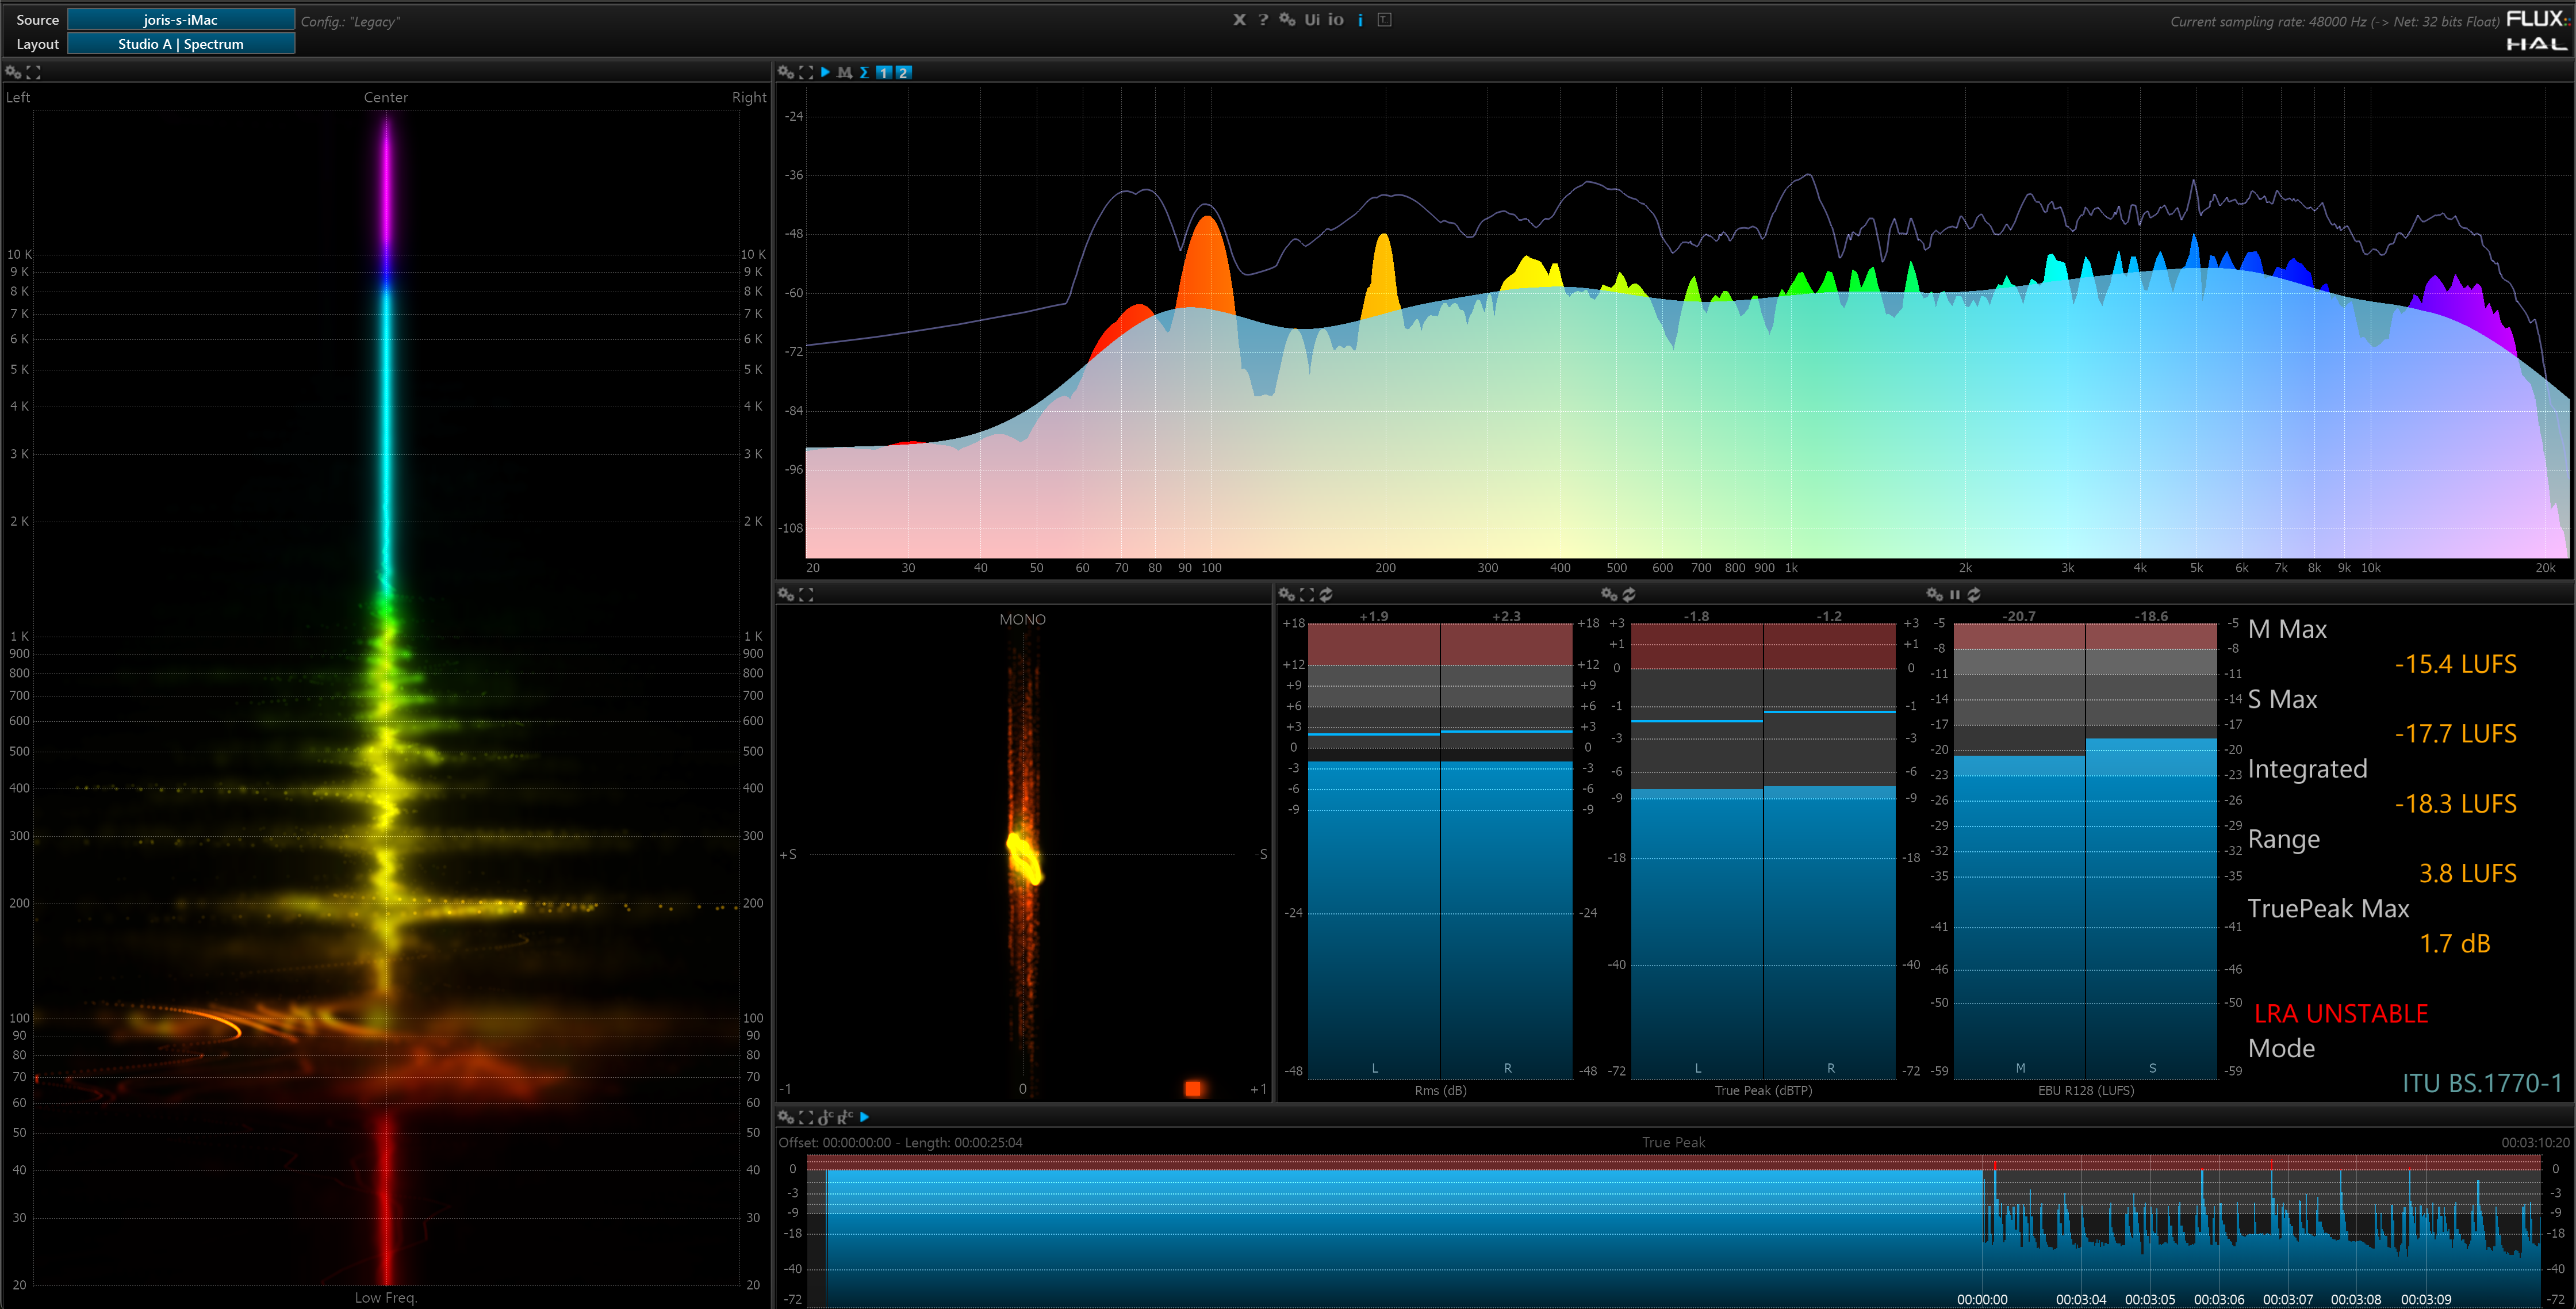
As you can see, the low end of our Lush 2 instance is exceptionally wide.
We are narrowing the stereo image just a bit to give that low end some more presence. This is done quickly and easily with another free tool, the Flux Stereotool:

The way we pick a wide low end here definitely doesn’t stick to the rule of trying to turn everything bass (typically below 200Hz mono) into mono. Go out and listen to Aphex Twin’s low end. At some occasions you’ll notice he’s using a low end reverb swamp, too, leaving us with an undefined bass rumble. By the way, that’s exactly how you make a techno bass rumble as well: take kick drum, make it send only, send it through a reverb, and sidechain it with a ghost kick …
Just saying it’s ok to break the rules, but know where to break them and why you are doing it.
Alright, so now that we picked the right tools, and we have an ambient chord progression and a melodic element with Lush 2 going, let’s get started on the drums.
Tip 2 - BREAK AWAY
Aphex Twin is all about experimentation and live performance.
You can’t imagine the result beforehand. Aphex Twin admittedly stated in an interview once that "he didn't know what he was doing”.
You need to experiment and perform your way to it. Record what you do, and then build your arrangements. You are now in the ideation stage, where great accidents should happen. Don’t try to overthink things too much. You will get better at this, the more you do it. It’s just crucial that you step away from the beaten track.
That’s also why we are not using our DAW sequencer for now. Everything happens in the built-in Drumazon sequencer, since it offers a lot more control to make extraordinary patterns. Look for the flam and accent settings amongst others: you get to finetune and personalize double, triple and quadruple hits.
Using Drumazon’s built-in sequencer unleashes another world of sequencing. Again: for once, don’t use your DAW sequencer. You’ll find it much easier to come with something you could never have imagined.
For now our Ableton session is only used to trigger different Drumazon patterns. We also put the global quantize to ¾, again so we can break away from the boring foor on the floor drum clips. Trigger your patterns with your Ableton clips, using Ableton as host. Drumazon is set to follow.
We have 3 instances of Drumazon loaded in Ableton, all with one and the same preset.
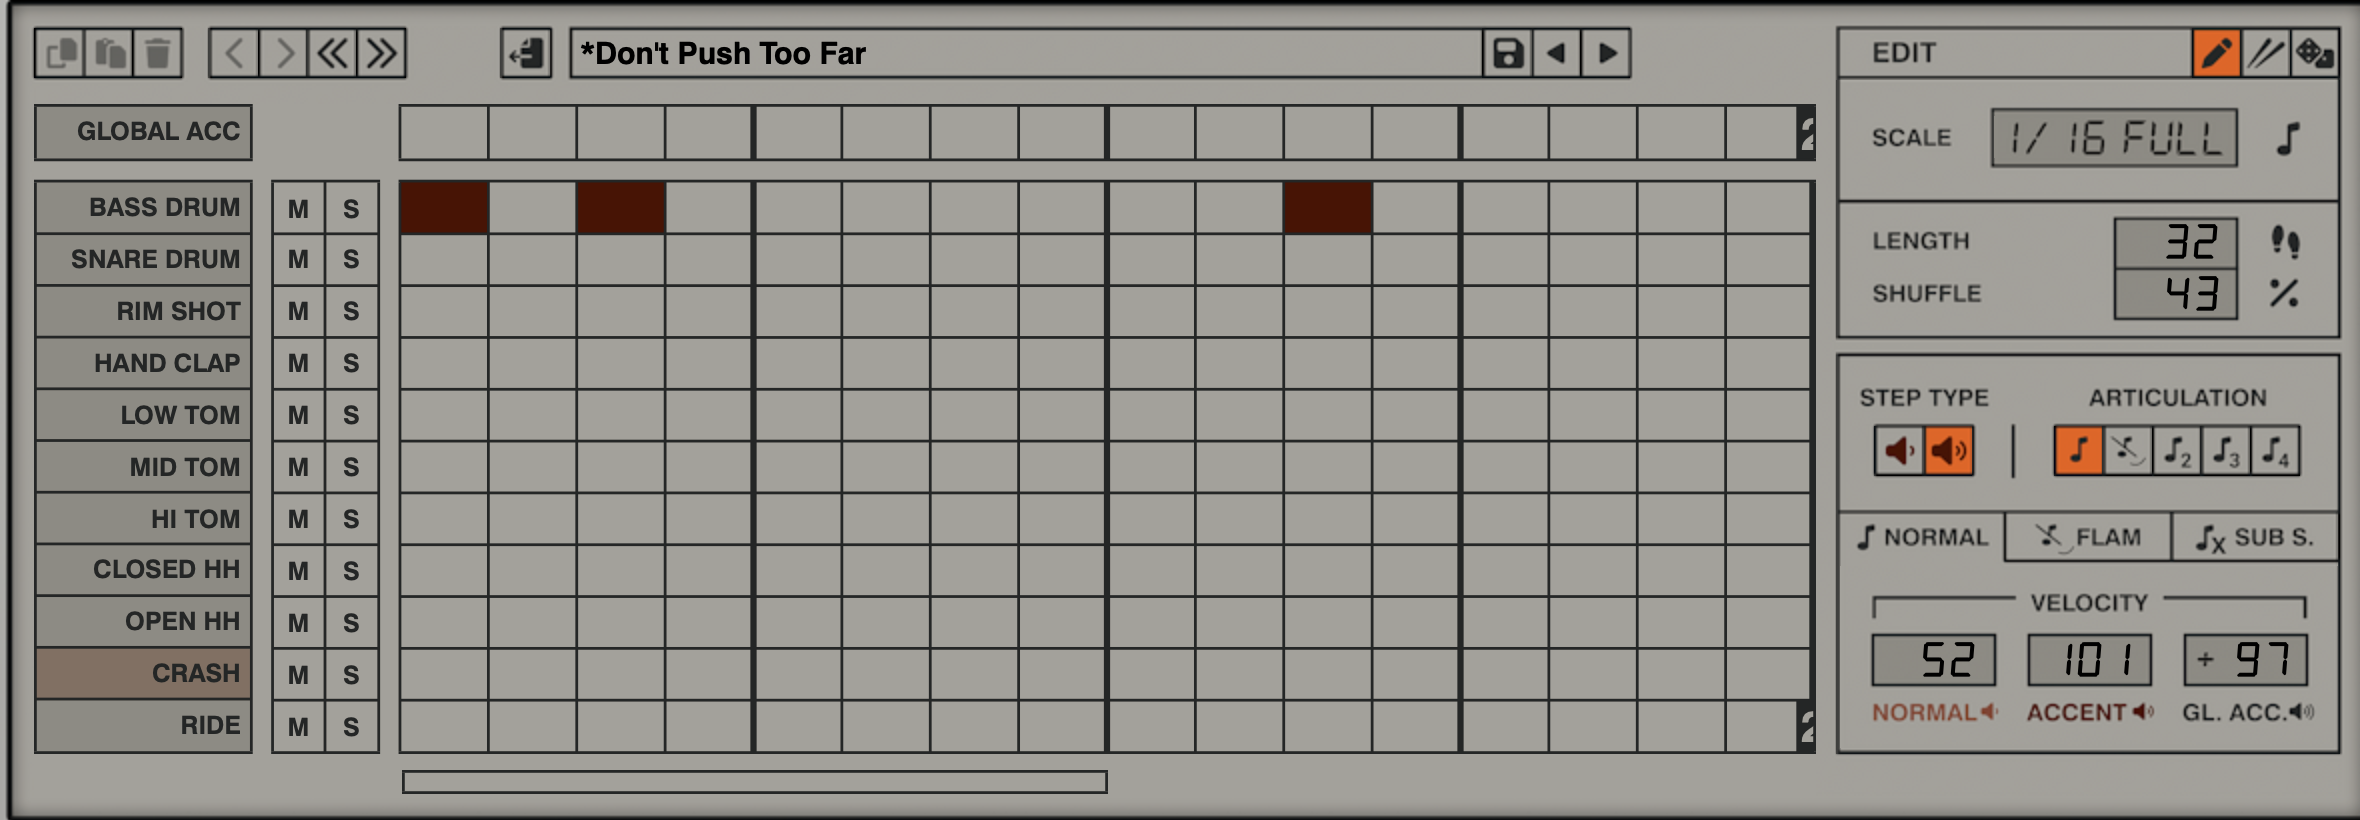
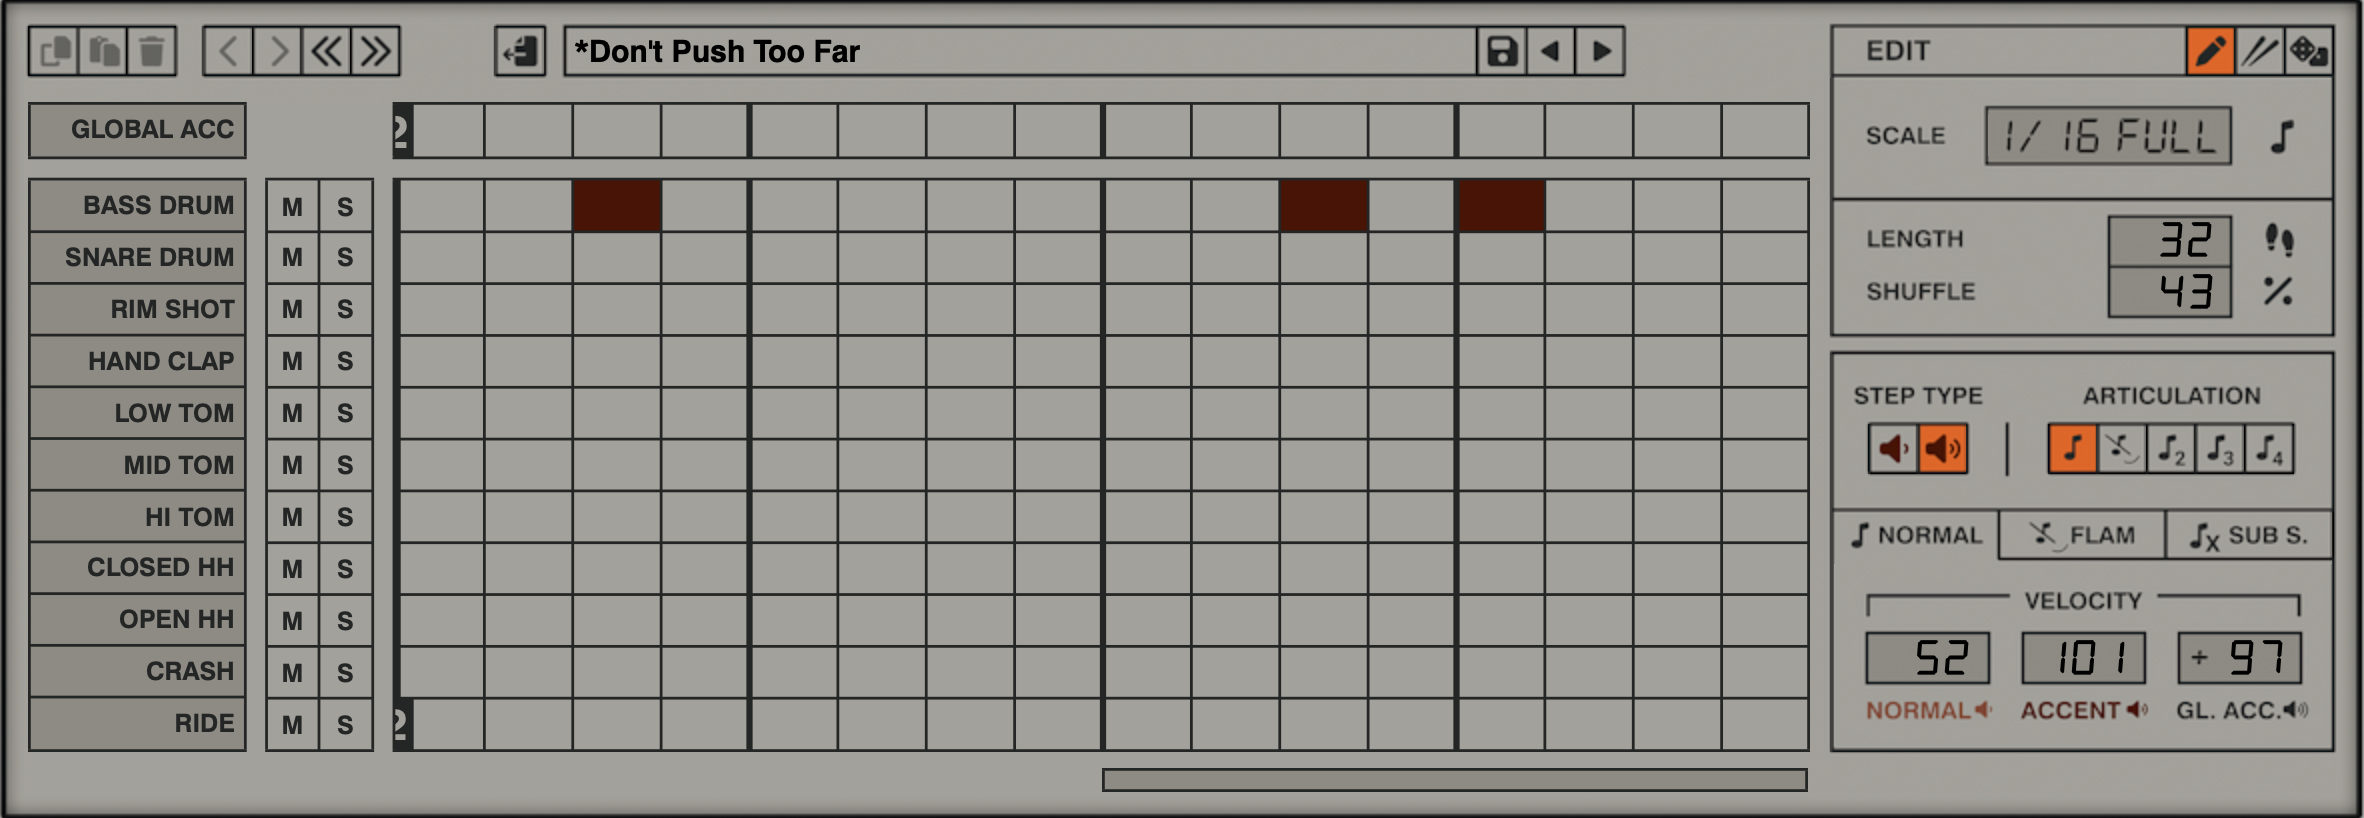
The first has a straightforward kickdrum pattern filled with syncopated snares, and the odd tom.
The second pattern holds a “broken rhythm” of very busy hihats and rim shots sometimes in sync, sometimes shifting away from each other. Both have the complex Drumazon accent and flam settings applied to them. At this stage you can already hear some of those Aphex glitches coming through.
We have one of the built-in 24db filters ready for use in the Drumazon FX chain to apply to the hihats, and by default we have the high quality bit crushing and distortion by D16Group applied to make them sound nastier and phat.
For the purpose of this demo, we just crafted one glitchy pattern, but things really get interesting when you start switching to multiple patterns. Try to focus on a particular sound, like we did with the closed hats, and then switch to another one, such as the snare for instance. That will warp your listener into another world with the snap of your finger.
Our third instance of Drumazon just has a few more closed hats to keep some drive…
Notice that all our drumazon instances have sequences that are up to 64 steps, and they all have relatively high shuffle settings. All over 65%. That’s to avoid things to sound all to mechanical.
I made sure my “regular” kick of the first pattern serves for maximum drive by giving it a long decay. I midi mapped the decay and tune of my hihats in the busy pattern, as well as the envelope settings of my filter that is sitting on top, so we can make those percussive high resonant hits for extra piercing transients.
Notice to the long decay of the kick, combined with the very short decay of the second instance of our Drumazon. The complex syncopation of the short bass drum is not taking away the steady drive of the longer kick.
These are the patterns we are using (you will notice we prepared for a 64 step sequence, but we're only using 48. That proved more than enough. In the end, we made the length of our Ableton clips not longer than this to avoid empty steps):
First instance
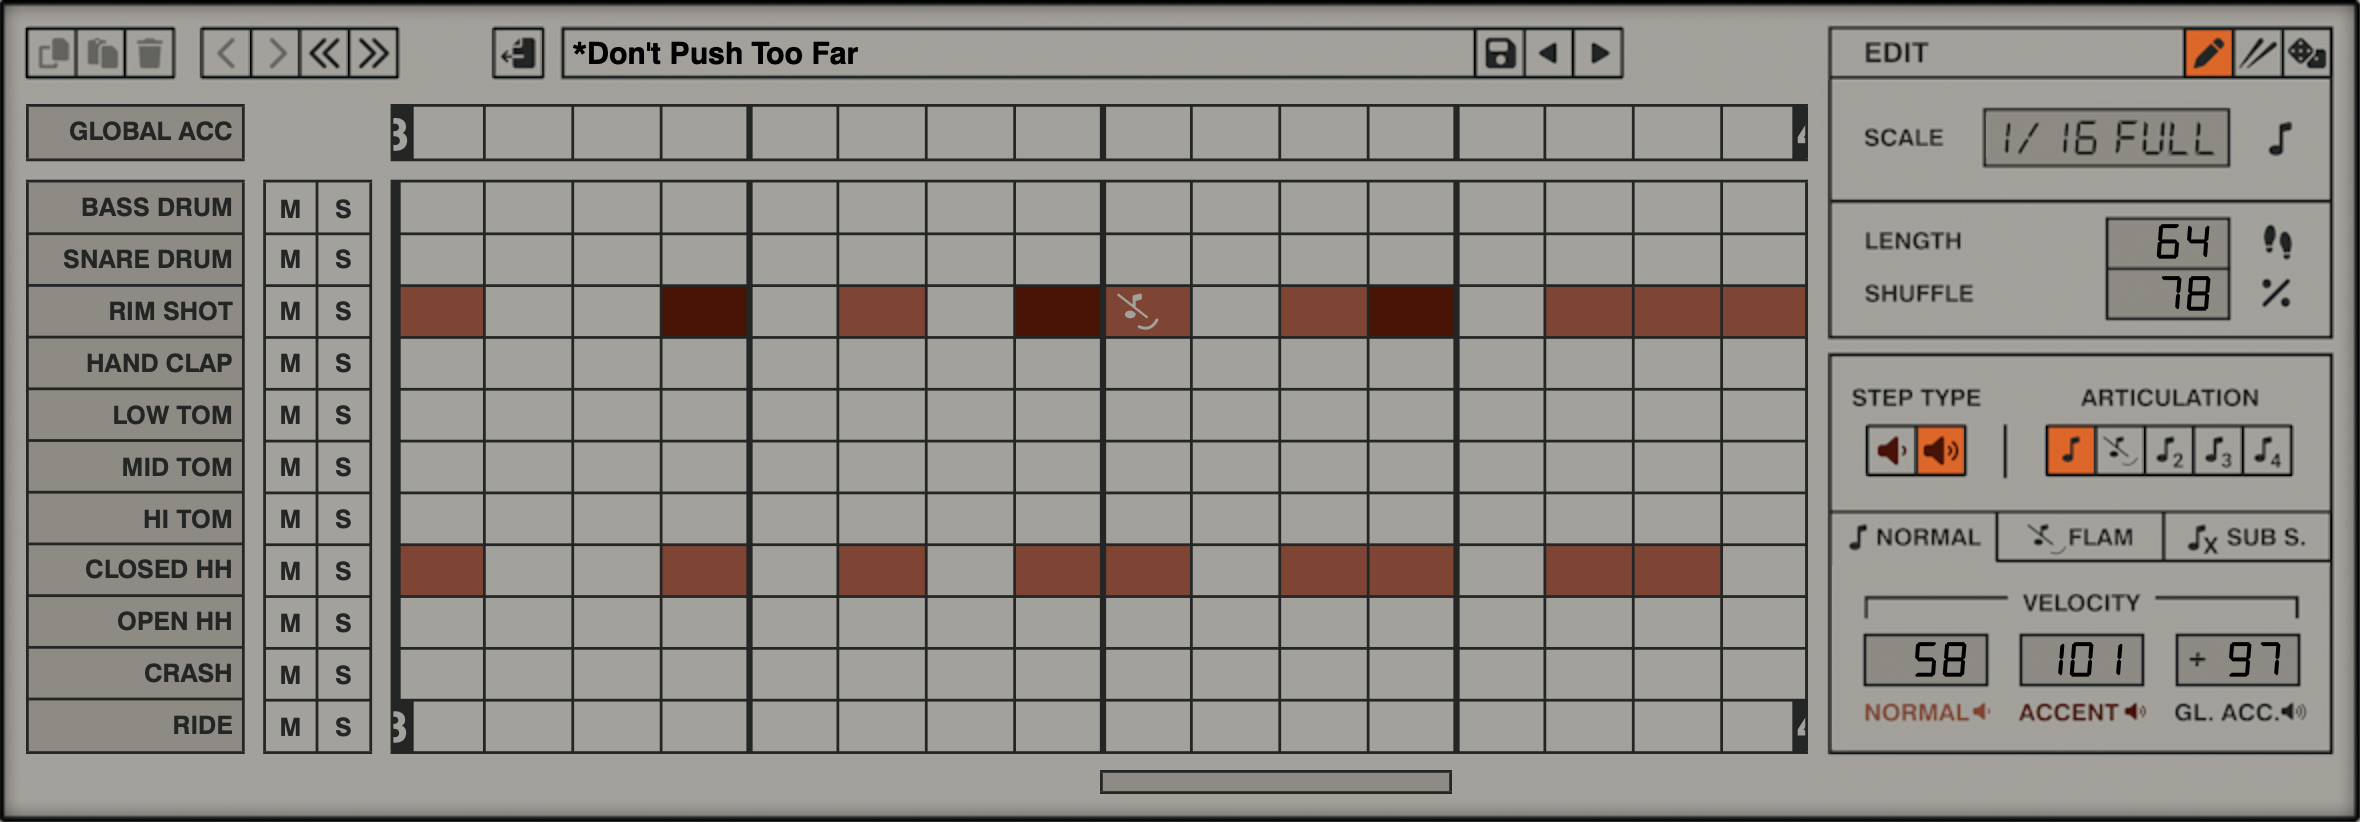
Second instance
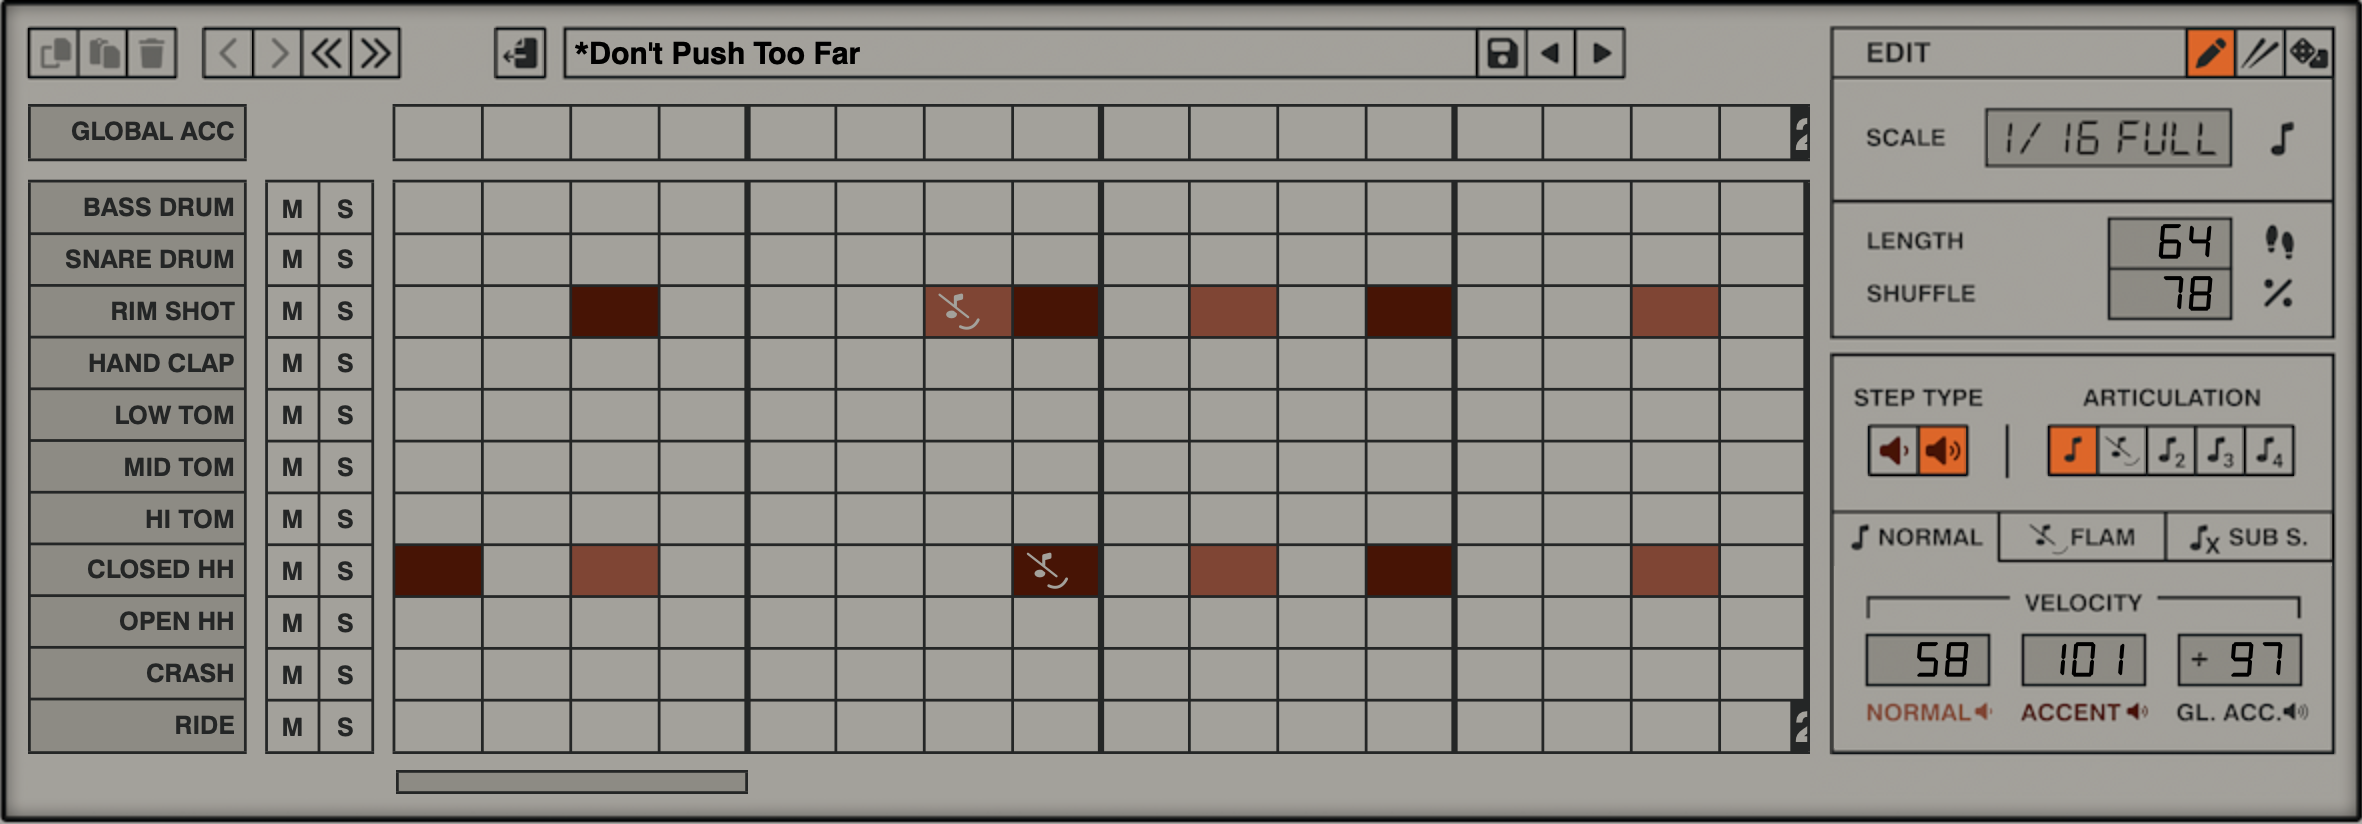
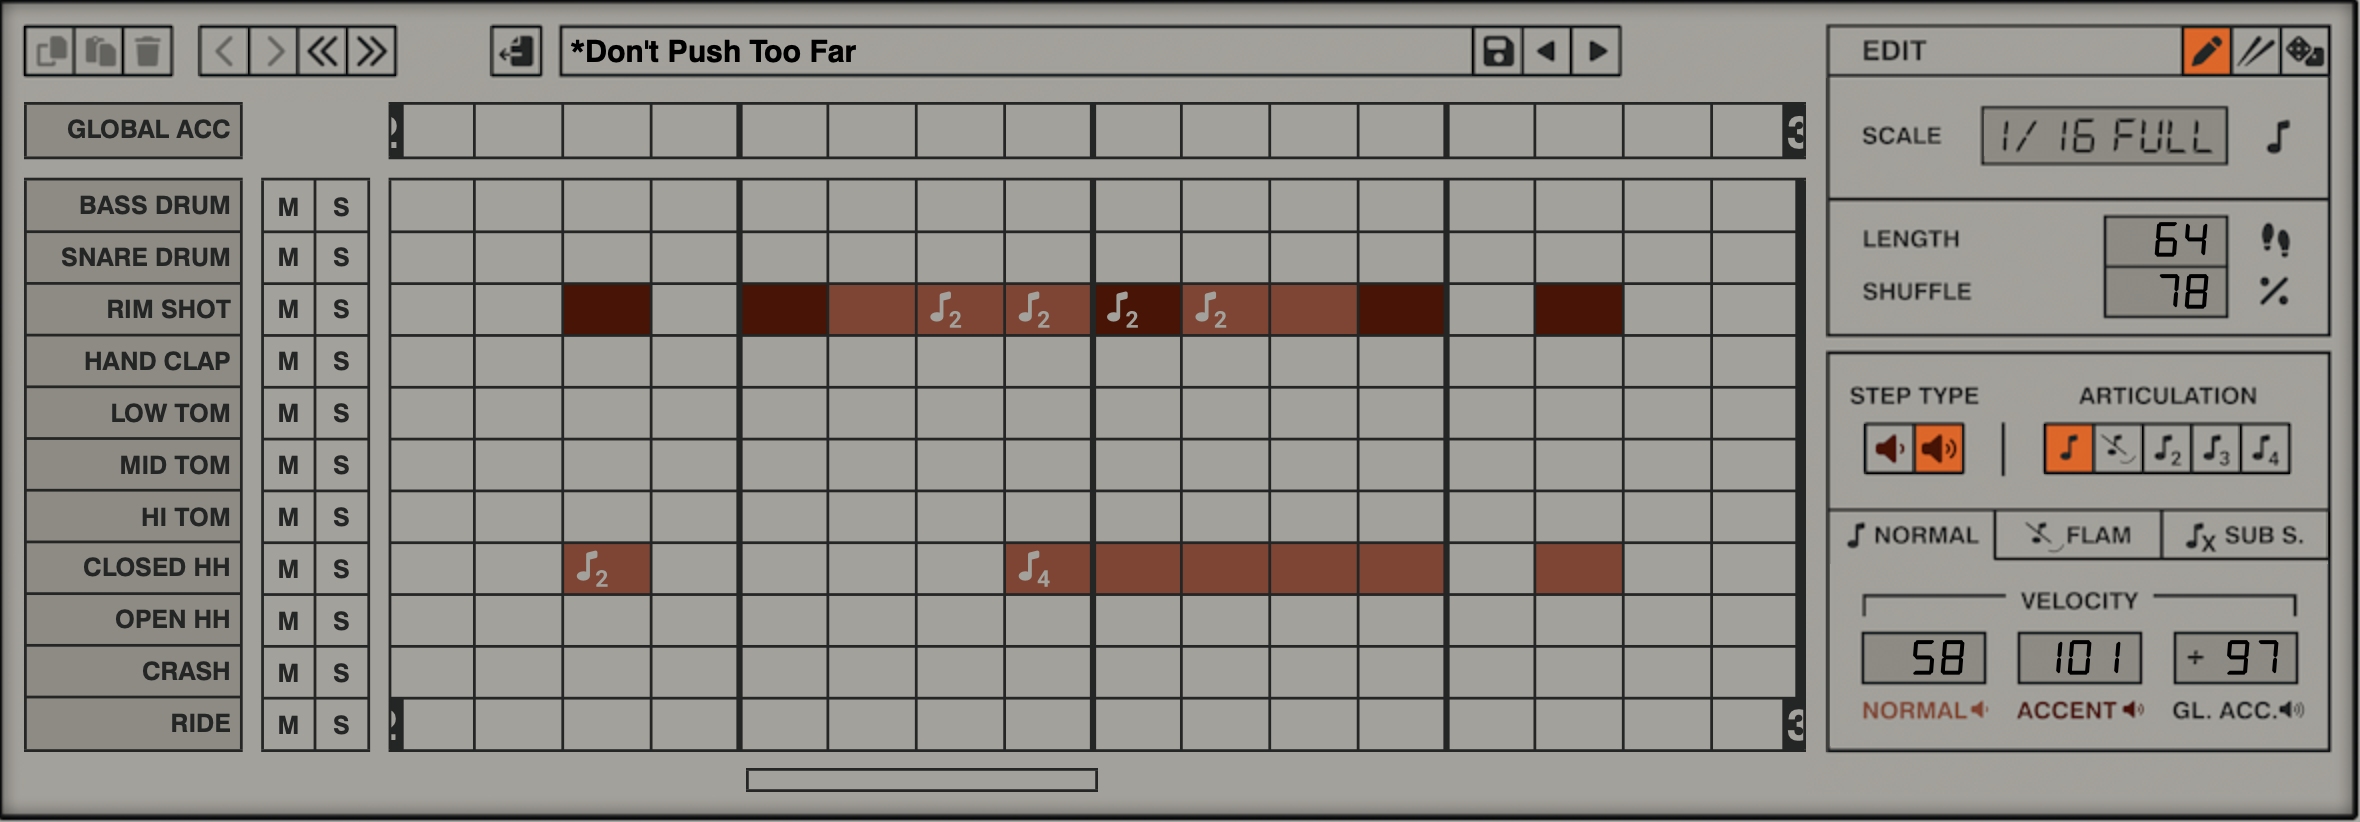

Third instance


TIP 3 NASTY RUFFLES
Drumazon’s closed hats sounds are ideal to make those metallic ruffles. I midi mapped the decay and tune, to give them movement.
Again, we’re using Drumazon’s built-in sequencer to come up with remarkable patterns with flams and glitchy accents. You can see how that pattern looks like from above screenshots…
As said earlier, make sure you always focus on one “busy” sound. In one pattern it will be the closed hihats, and in another we’ll go for a crazy snare. I also layered rim shots over the closed hihats, and made them deviate only slightly to then have them come back in sync… sounds like a mind warp 😊
TIP 4 SEND YOUR EFFECTS TO THE MOON

At this stage, it’s ok to overdo your effects.
Make sure you can get max control over your sound. Be conscious of positioning in space ; what should get focus, what not, and swap these positions to surprise and keep things interesting. For this to work, choose your sounds well, to make a well defined mix possible in a later stage
What works really well is to midi map your reverb send, so you can exaggerate certain hits or parts. Record that, and when you arrange your track, cut that tail, so you get a build up that is drastically replaced by a pattern with a very dry and close focus, appearing to be very near all of a sudden.
I midi mapped just a few basic parameters to show what you can do with very little already. Just play around and use Drumazon’s built-in FX. We particularly love the reverb, the filter, the bit crusher and distortion…
So now, the fun can begin. Time to fiddle with a few knobs! Don’t forget to record what you are doing.
TIP 5 MUSIC IS PLAY NOT WORK
Don’t draw your automation. Like, seriously. Don’t do that. It will only make your track sound dull and hermetic. I know so many people who think they need to design that perfect track. Forget about that. You are making music. So, let’s play music and perform instead of acting like a manager filling out an excel sheet. Anything goes. This is your world.
Don’t worry too much about how things will sound as yet.
Just play around, and get some things recorded on the canvas, which you can then cut and paste.
Drumazon just sounds incredible, no matter what crazy idea you come up with, every sound is well defined, crisp and clear. This is really a dream if you are after a musical instrument that will get you beyond the typical dull drum machine you have heard 100 times before.
That’s quite astonishing for a drum computer that started off as the immaculate emulation of the famous TR909. But Drumazon is taking us on a yourney so much further from what we thought we knew.
Listen to how the filter sounds; your hihats are now resonant transients, nothing like the original sound you started off with. Great stuff! If you like Aphex Twin, you’ll love this :)
Make your sounds shift to create interest, be subtle, be abrupt, but don’t be anything in between. Make choices
Tip 6 DUB DUB DUBBY DUB DUB
For our melodic element, we have inserted just a few high notes with another Lush instance, using an organ preset this time.
We'll only keep a melodic suggestion though, playing a note, muting it, and sending those cut-up tones to the D16 Group Repeater plugin, which can give you those endless modulated vintage delay slapbacks instantly. Repeater is extremely simple, but it has such a convincing sound, even when just picking a preset - in this case - unsurprisingly - we're going for “Modern Tape Slapback”. You could switch off the sync button, to move the delay timing freely, but I love to keep it on so that my tape delay jumps in "steps", giving these lovely mindwarping detune effects in addition 🥴

It's probably overkill, but just to show you can map any Repeater parameter to your standard midi controller through Ableton 🤪 :

We also midi mapped the send level and the on/off button for the send.
Very easy now to get these dubby self-oscillating delay walls, let them grow and cut them off…
Again, we’ll record our performance here, so we can use the best parts for our final track structure.

You’ll see that with Repeater it’s very easy to bring some of that Scratch Lee Perry dubbiness in your tracks.
Tip 7 MIND YOUR HERZ
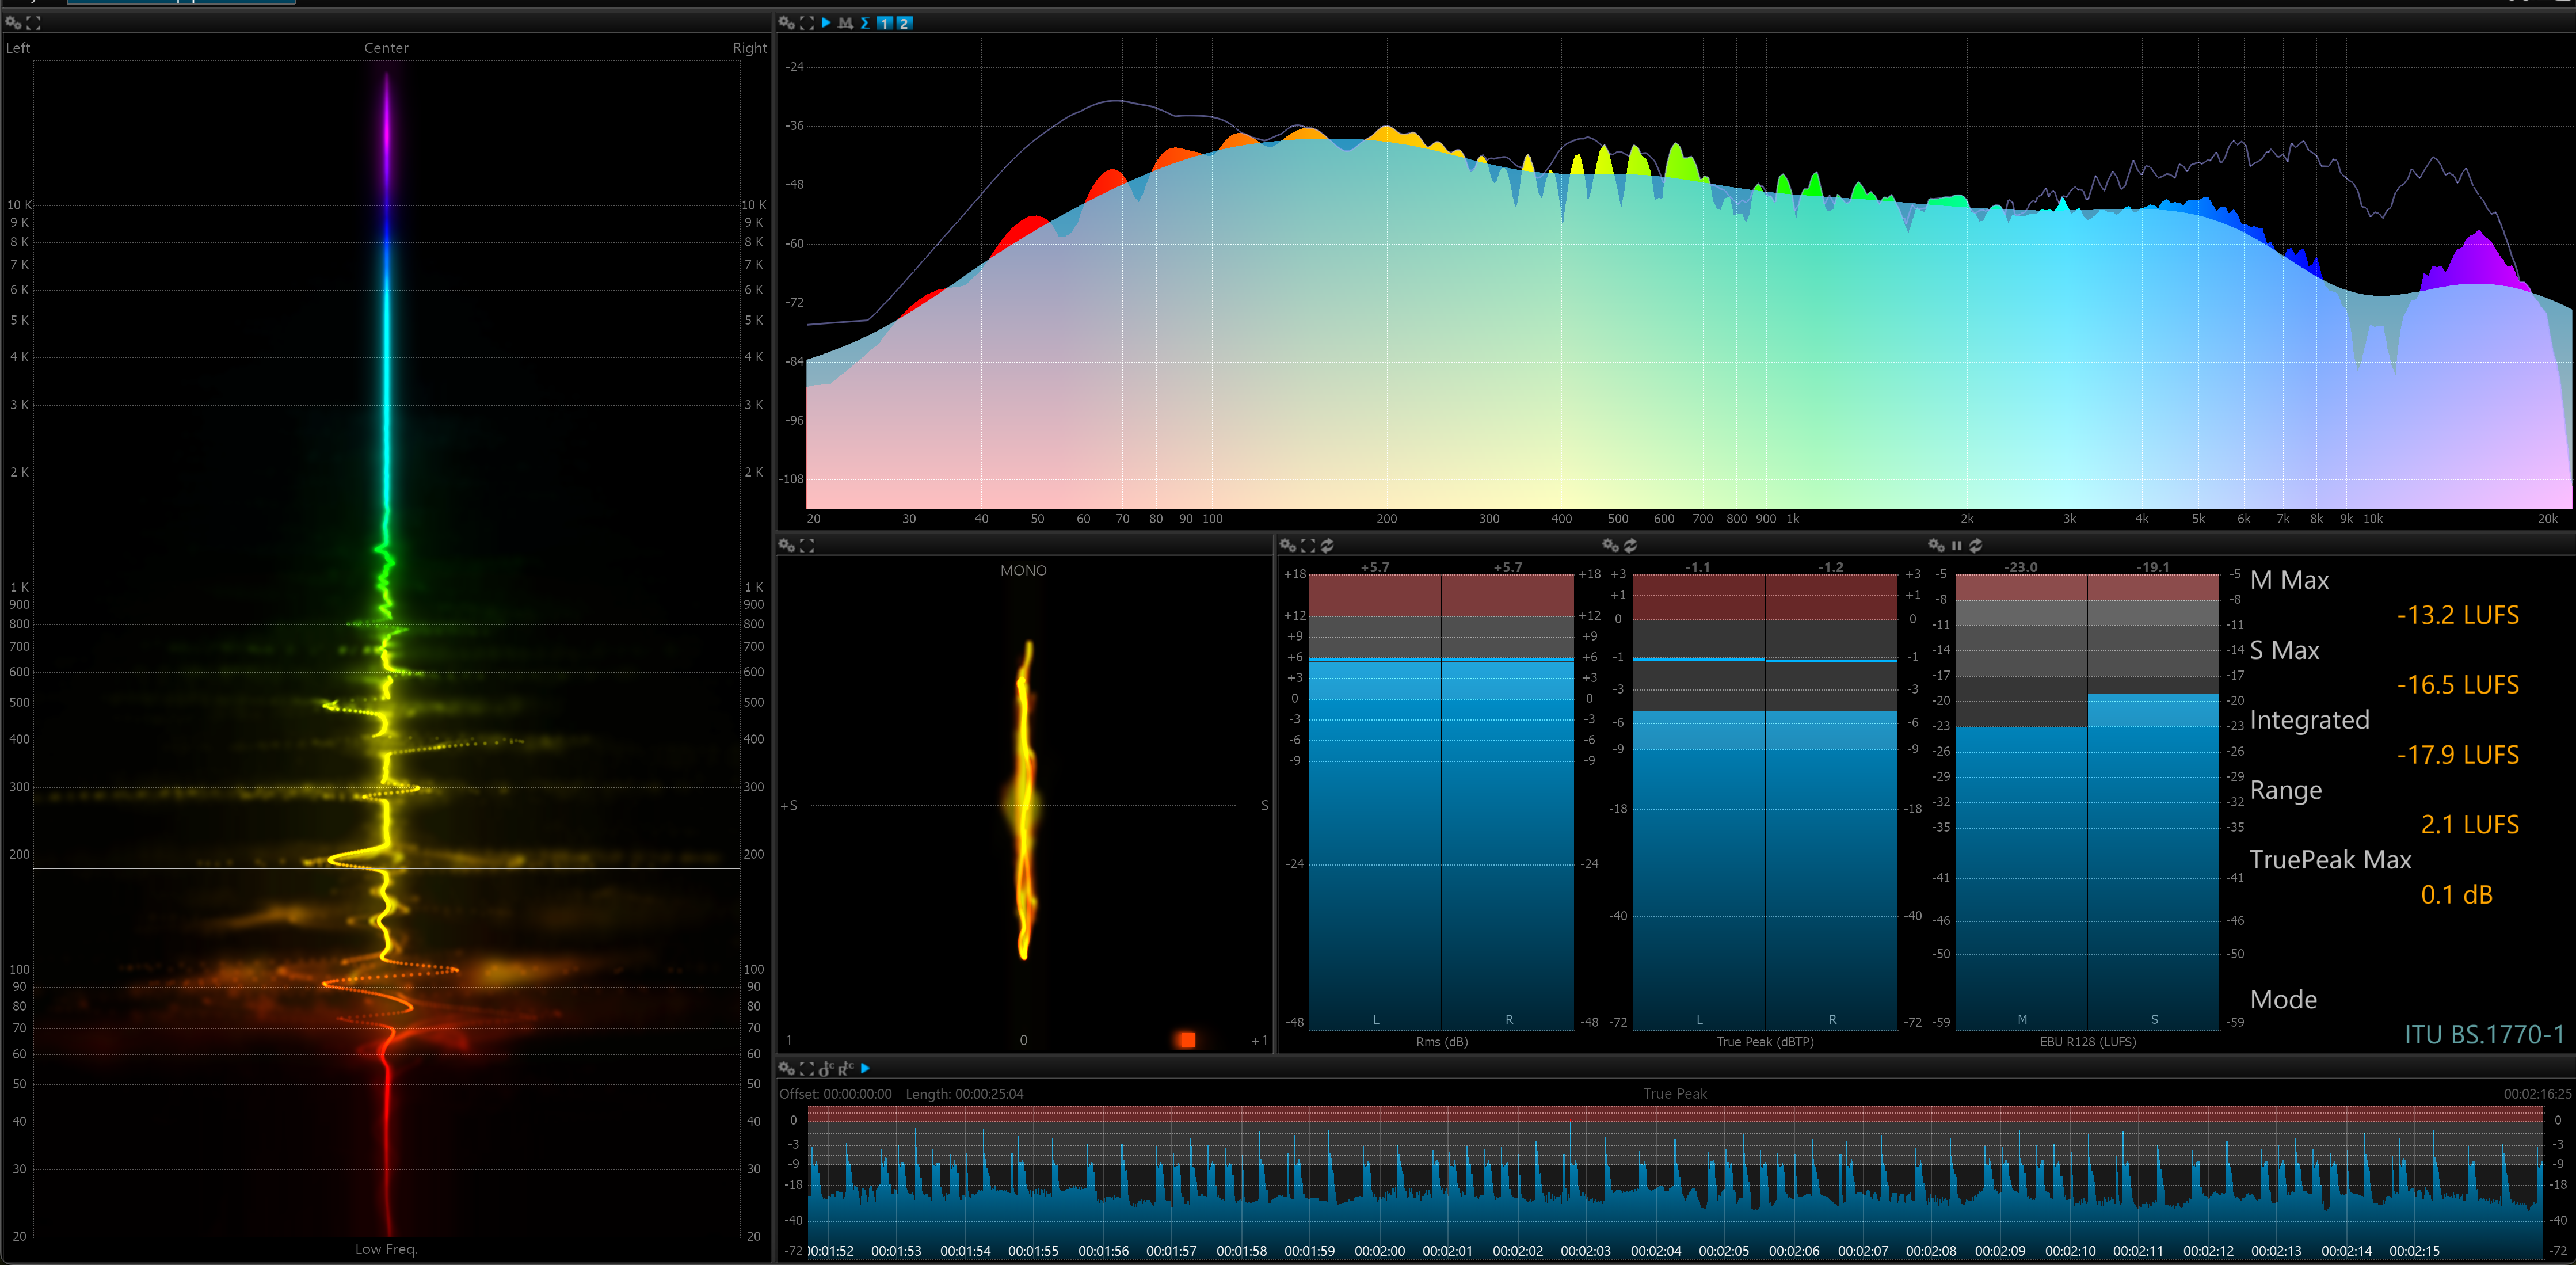
Drumazon 2 allows you to route every single sound to a separate output, each of which you can wire to individual audio channels.
Very important for the mixing stage, because you know you are going to end up with a very full audio spectrum, with busy patterns versus main elements that need to cut through the chaos you are creating 😊.
We want to be able to bring out the right audio spectrum bands for each sound, so they sit well next to each other.
Of course, you will help yourself a great deal if at the start you are already thinking in audio spectrum bands when you pick your sounds. Think in terms such as 50Hz for the kick, 60Hz to 120Hz for the bass, 1kHz for the snare, 2kHz for the hihats, etc…
Alright folks, that’s it for this session.
Hope to see you on the next one!
Credits to D16 Group for making the fantastic drum computer emulation Drumazon2, Lush2 and the Repeater plugin.
Crazy stuff.
Go out and get you a copy of these D16 gems!
I guarantee you won’t regret it.
Peace out people! 🖖
BBJinx